

How to replace bath or shower sealant
There’s no need to replace bath or shower silicone if it is just discoloured.
Replacing the silicone sealant on your bath or shower is not always necessary. This article will tell you why.
You can also find out here what causes silicone discolouration and read a step-by-step guide on how to return the sealant to pristine white without replacing it.
However, HomeForce’s Edinburgh Handymen have replaced silicone sealant on the baths and showers of many hundreds of Edinburgh homes since we were established in 2004. So, if you really do need a professional to replace silicone in your property then call us on 0131 315 0000 or complete our tradesperson booking form.
Silicone or grout – what’s the difference?
Customers of HomeForce often request “Replacement of Grout” when, in fact, it is the bath or shower silicone that is in need of attention.
What is the difference between grout and silicone?
Grout is the hard cement like material that goes between tiles. It comes in various different colours though white is the most frequently used.
Silicone is the more pliable gel like substance that is applied – amongst other places – at the joint of where a bath or shower meets the tiles (or wall board).
Both silicone and grout can discolour or, indeed, become brittle and allow water penetration. Grout should, when applied properly, be more durable than silicone. It is rare that the need to re-grout arises and frequently indicates some other underlying problem such as movement of a bath, shower tray or even a wall.
When should silicone be replaced?
Replace silicone if it is becoming dry, brittle or cracked or it is coming away from tiles or the bath or shower edge.
Leaks may not be apparent – by marks on the ceiling below – if you live on a ground floor or basement so it’s worth checking the silicone reasonably regularly (once or twice a year).
When is it not necessary to replace silicone?
It is usually not necessary to replace silicone just for a build up of black mould or discolouration.
Mould is a bacteria, or germ, that grows in a damp atmosphere. As such it can be killed using bleach (“Kills all known Germs”!).
Other discolouration on silicone (or grout) can be due to the pigment from soaps, shampoo’s or other products used in bath’s or showers. Again, these can be cleared using bleach.

How to return discoloured silicone sealant to pristine white.
Step 1:– Buy a strong, thick bleach in a bottle with a directional nozzle. Avoid own label bleaches as they don’t have the viscosity required. Also buy some rubber gloves to protect your hands.
Step 2: – Apply the bleach directly from the bottle onto the silicone and along any discoloured grout lines.
Step 3: – Leave for 15 – 20 minutes (or longer)
Step 4: – Wipe off the bleach using warm water and a soft cloth. Do not scrub the silicone or grout.
You will probably find that any residual discolouration will continue to disappear over night, even after you have wiped off the bleach.
If the discolouration is particularly bad repeat steps 2 – 4.
Ensure the room is well ventilated while doing this as the “fumes” from the bleach can be quite strong.
Note that there are some products sold as silicone or grout cleaner. In our experience these are not as effective as neat bleach.
How to prevent black mould on grout and silicone in the first place.
Prevention is, of course, better than a cure.
Stopping black mould from forming in your bathroom in the first place is a good idea, not least because, if left unchecked, it can have detrimental effects on you or your family’s health.
To stop the build up of black mould in your bathroom:
- Keep the room well ventilated.
- Install (and use) a good extractor fan.
- Open a window during and after baths and showers.
- Leave shower cubicle doors open after a shower.
- Wipe down the edge of the shower / bath after use.
- Avoid leaving wet sponges and cloths in permanent contact with silicone or grout
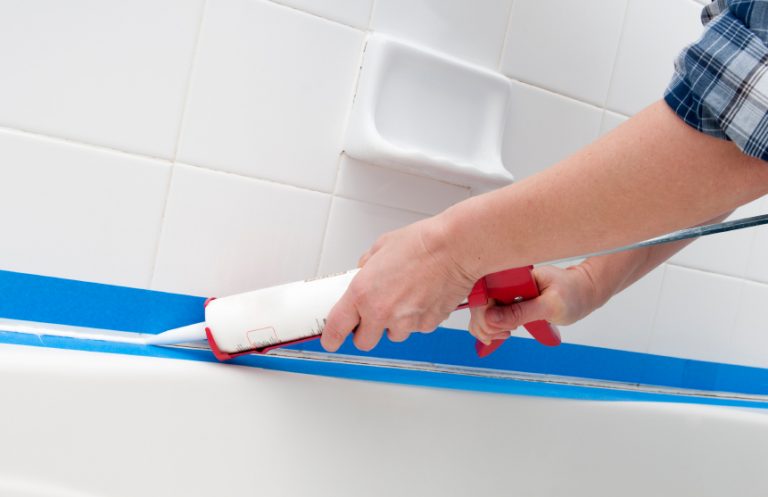
Tips for replacing bathroom silicone.
Replacing bath sealant or shower sealant is something that most people can do with the right tools, some time and a little bit of patience.
If you are replacing bath or shower silicone sealant there are a few things that are worth keeping in mind.
- Ensure old silicone is completely removed before applying new. Silicone removal products will help this but white spirit can also be used.
- Removing old silicone is the most time consuming and fiddly aspect of the job but it’s important to get it right.
- Residual silicone left on the bath / shower or tiles can result in areas of weakness for water to penetrate.
- Dry the area fully before applying new silicone.
- Use a good quality bathroom silicone with a high level of mould resistance. We’re fans of Dow Corning silicones. They are more expensive but definitely worth the couple of extra pounds for a tube.
- Leave the silicone to dry (cure) for at least 24 hours before using the shower.
If you doubt your ability to replace silicone and leave a water tight seal then HomeForce are happy to help.
The result of leaks caused by poorly applied silicone can be far more expensive and time consuming than the money saved by doing it yourself, or paying someone who doesn’t know what they are doing.
What does it cost?
Removing old and applying new silicone to a bath or shower tray will usually take a HomeForce Handyman around one and a half to two hours and so cost from £55 to £70 in labour charges.
A tube of good quality silicone costs around £5 – £6. Parking charges would also be passed on at cost.
Please note that this is not a guaranteed cost. Each job is different. A HomeForce handyman will advise approximate costs onsite before progressing.
Book an Edinburgh handyman to replace the silicone in your bathroom (or kitchen)
- Complete our Tradesperson Booking Form
- Tel: – 0131 315 0000
- Email: – info@homeforce.co.uk

