

Edinburgh Picture Hanging Service
Looking for a reliable picture hanging service?
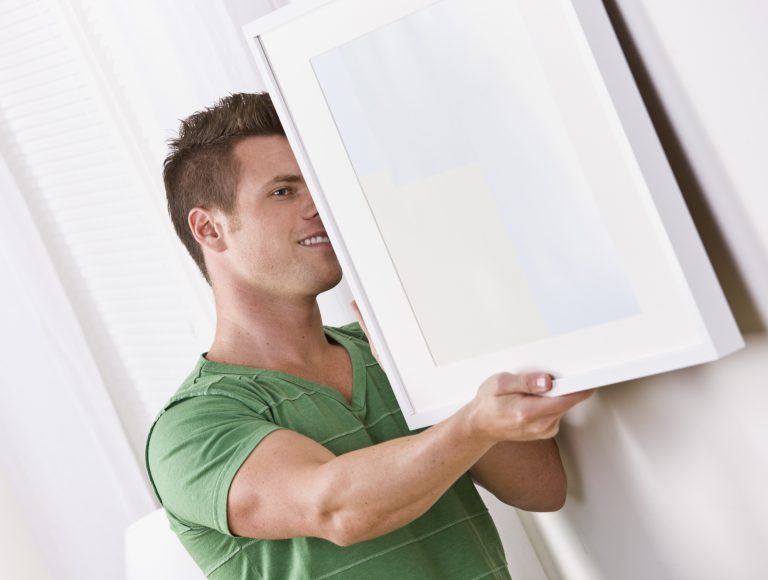
HomeForce’s Edinburgh Picture Hanging Service. For those who lack the time, skills, tools or confidence to undertake picture hanging themselves.
Complete our Book a Tradesperson form or call 0131 315 0000 to arrange for a handyman to hang pictures for you.
Read on to find out potential costs, how long hanging pictures takes and also the factors that affect the cost & duration.
Tips and suggestions are also included for those intending to do their own picture hanging.
DIY Picture Hanging?
You might think “how hard can it be to bang a nail into a wall?”
Well, for a start, there are different wall types that require different fixings and different tools to consider. The picture hanger must also allow for the stretch of the wire / string when position pictures. Avoiding water pipes and electrical wires and locating studs or struts in walls are also, to say the least, helpful skills.
If you are now thinking “Actually, maybe not.” then contact HomeForce (0131 315 0000) to book a professional, experienced and reliable picture hanger. They also hang mirrors.
What does it cost? How long does it take?
HomeForce’s handymen make a minimum charge of £50 (no VAT) which covers one hour of work. (Please note that this is only when work is carried out. It is not a call out charge and is not a charge to come and do a quote or estimate). Each subsequent hour is charged at £50 / hour and charged to the nearest half hour.
Parking charges are passed on at cost. Any materials used will also be charged for separately.
Allow 10 to 20 minutes to hang each picture or mirror. This should be sufficient for positioning and measuring, drilling holes and putting in fixings and, naturally, hanging the picture.
Every situation is slightly different (thus the wide variation in time to hang each picture). Factors that will affect how long each picture takes are:
- Wall type.
- Number of fixing points required.
- Weight of picture / mirror.
- Method of securing picture / mirror (Brackets, string / picture wire & hook, battenetc).
- Whether fixing / hanging point is already attached to picture.
- Arrangement of pictures (For example if pictures are to be hung as a montage).
Wall types
The following are the three main wall types to be found in Edinburgh.
1) Plasterboard / stud wall.
- Most common in houses built after the 1950s or 60’s.
- Usually walls will be timber frames (struts/posts) covered with the sheets of plasterboard attached with either screws or nails.
- Recent new-builds often use fewer timber studs for partition walls. Lightweight box metal may be used instead of timber.
Plasterboard is not the best wall type for picture hanging, especially for very heavy pictures or mirrors. This is because it is, after all, just paper and gypsum (plaster). However, there are a number of fixings that are devised specifically for securing items to plasterboard walls. These fixings can support surprisingly heavy loads.
Fixings will have a load bearing capacity; usually specified on the packaging. The weight / load bearing capacity may vary depending on the thickness of plasterboard.
The same type of plasterboard fixing may be referred to with different name: Redi Drivers, hollow wall fixings / anchors, butterfly fixings, toggle fixings, rotor plugs or spiral fixings are all variations of plasterboard wall fixings.
Particularly heavy items can be hung by a fixing that goes into the timber struts (or studs) that form the framework of the wall. Sometimes it may be necessary to secure a batten between two struts and affix the picture / mirror to this.
How to locate a timber on a stud wall
- If you don’t have a stud finder tool, tap on the cavity wall – there will be a more hollow sound between timbers. Note also that the vertical timbers are regularly spaced starting at the edge of each wall.
- Usually studs are spaced 16” / 400mm apart but can be up to 24” / 600mm.
- Once you think you have found a timber stud drill a small hole. If the drill comes out with wood shavings down the bit, you are drilling into a timber. If after 1 – 2 cm the drill bit meets with no resistance then you have failed to locate the timber.
- IMPORTANT: – Use an electric cable or pipe finder before drilling to make sure there are no pipes or electrical cables behind the plasterboard.
2) Solid or “plaster on the hard” walls.
- These could be stone, red brick or breeze block walls with a thick skim of plaster applied to them (First a bonding coat and then a final skim).
- They are great walls to securely hang pictures, mirrors or any item to.
- Rawlplugs with suitable screws should be used but making sure the fixing is strong enough to take the weight of the item.
Start by drilling a hole to a depth of one and a half to two inches. The fixing should always penetrate into the stone / brick work, not just in the layer of plaster. Bear in mind that some walls of this type can be incredibly solid so you will need a good hammer drill or SDS drill with a masonry bit.
Push a rawlplug into the hole, making sure it is flush with the wall and tightly embedded (not rattling around in the hole). Then insert the screw leaving enough protruding to hang the picture from.
IMPORATNT: Never drill above or below light switches or plug sockets. Electric cables may be concealed in the wall. Use an electric tester to check before drilling.
3) Plaster lath / lath and plaster walls
- Found in many Edinburgh New Town and Old Town properties.
- They are a a bit of a cross between the above two wall types. A timber framework (like a stud wall), with strips of thin timber (the lath) between studs.
- Will have a thick layer of bonding plaster (approx. 1 inch) and thin layer of finishing plaster (approx. 2 – 3mm)
Plaster lath walls are not so good for hanging pictures (or anything) on. When unavoidable pre-drill a small pilot hole, then put a screw directly into the lath or, if possible, a stud.
Often, properties with lath and plaster walls will have picture rails. Picture rail hooks are used for hanging pictures from these.
Should you use wire or string for picture hanging?
Wire is better than string especially if your picture or mirror is heavy. Wire is stronger, the knots won’t come undone and it doesn’t relax (i.e. stretch) causing the picture to hang lower or squint.
Special picture cord made from quality low stretch polyester that is strong and will not rot or wear out over time is also an option.
Tips for positioning pictures
- Place a picture propped up in the location you are thinking for a few days before hanging it. That way you can get a feel for it at different times of the day and in different lights.
- Try to avoid hanging paintings in direct sunlight as this will cause the colours to fade over time.
- A small room can be made to appear larger if pictures are hung approximately 3-5 inches lower than the “average” eye level.
- If the picture or mirror is bigger than the piece of furniture below it, it will look unbalanced.
- Hanging a large mirror at one end of a small room will make the room seem larger. Mirrors can also be used to make dark rooms much brighter.
- Hang groups of pictures on large wall spaces rather than one large picture.
- Consider whether people will be standing or sitting in the room (Hallway v’s dining room or living room). Generally pictures are hung at around eye level but this can be lower in a room where people predominantly sit down.
Book a picture or mirror hanging appointment now:
- Complete our Tradesperson Booking Form
- Tel: – 0131 315 0000
- Email: – info@homeforce.co.uk

